
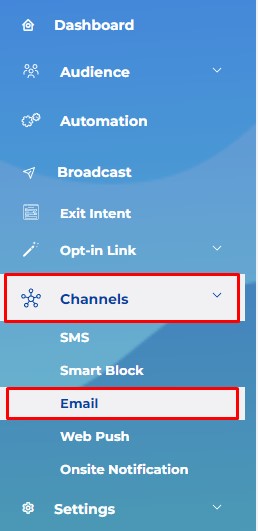
Step 1: Log in to your Umbrella account. Go to Channel -> Email.
Step 2: Click on “Create Template +” button. Wait for the editor to load.

Step 3: Once the editor is loaded, add Template name, Subject Line and Preheader Text.

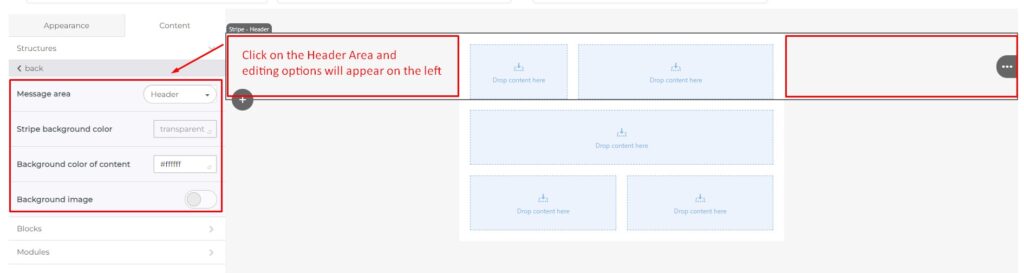
Default template structure will show up in the editing field. Each email template consists of 3 blocks: Header, Content and Footer. To edit blocks click on the gray area and the block will be selected.


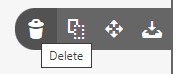
Three dots on the far right side will open up a menu. The menu contains the following options: Delete, Clone, Move and Save Module. Hover over each button to see their function.
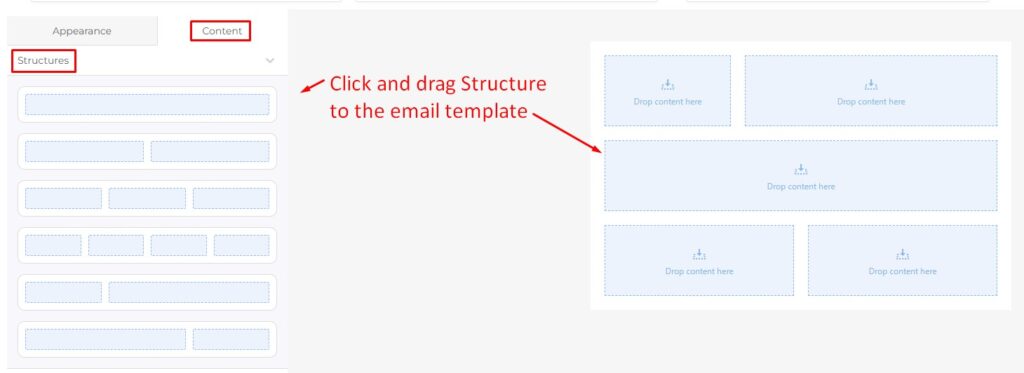
Each block can contain multiple structures with different layouts.
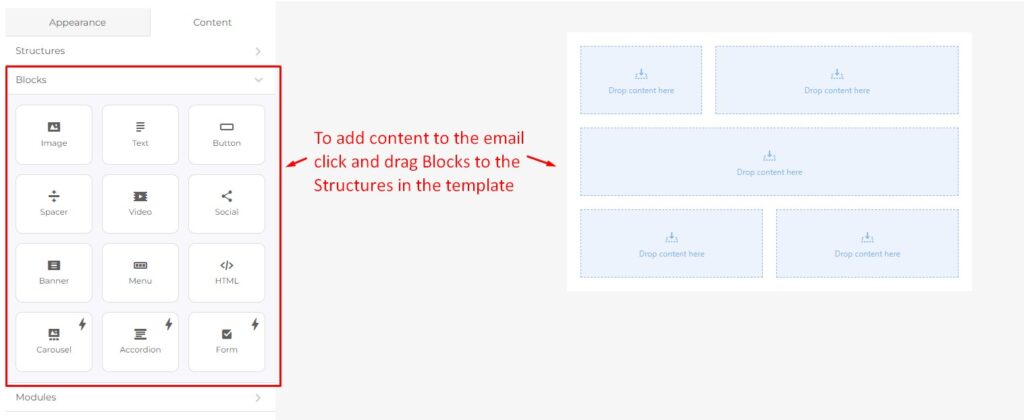
To select a layout click on Content-> Structures on the left side and click and drag the layout you want into one of the blocks.
Once the structure is added to the email, it can be deleted, cloned, moved or saved in the same way as a block.

To add content to the Structure, click on the Content -> Blocks and select and drag the block you want to add into the Structure in the light blue area “Drop content here”.
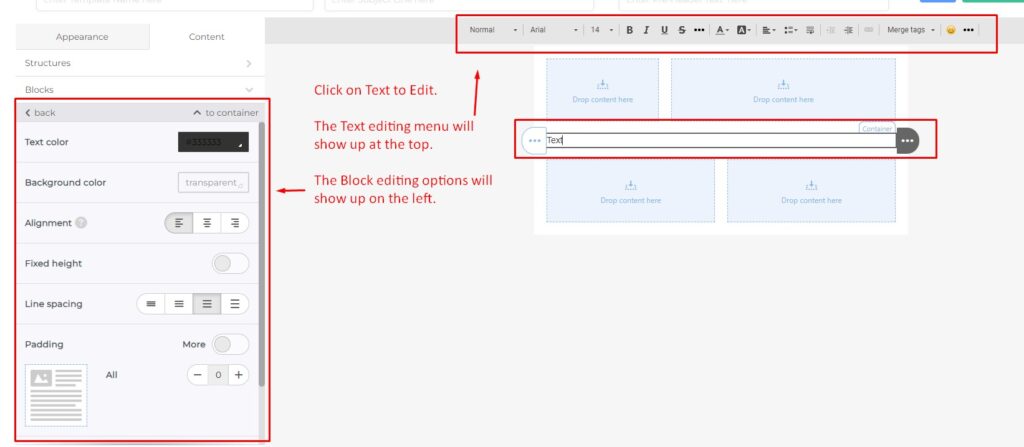
Each Content Block can be edited. To edit the block in your email template, click on it and depending on the block type editing options will appear on the left side and on the top of the email template. Below is example of editing options for the text block.
The text can be added directly inside the email template.
Content Blocks can be deleted, cloned and moved in the same way as Structures.

To edit General Settings of the email go to Appearance -> General Settings, on the left side of the screen.

For the compliance purposes we recommend adding physical address of your business in the footer of the email and adding an Unsubscribe link. Please see example below.
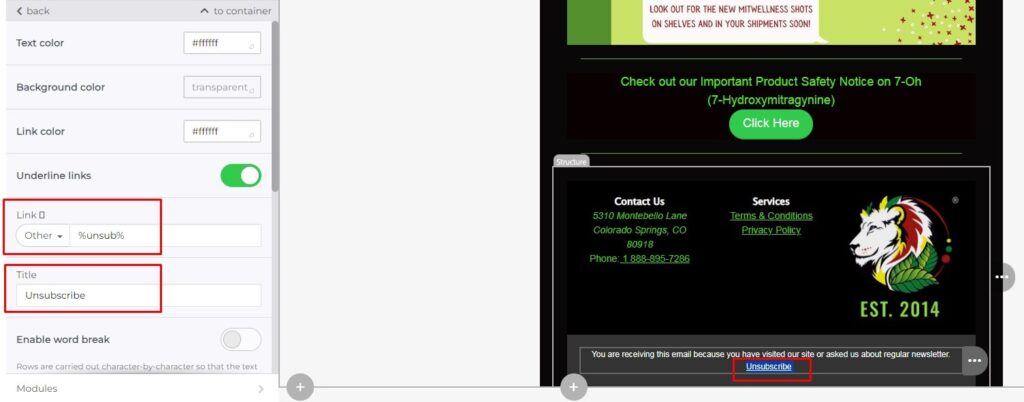
Add a Text block to your footer and type the text similar to the example above. Select the Unsubscribe text and make it into a link. When text is selected, the top editing bar will appear. Click on the link button while “Unsubscribe” text is selected.

On the right side the link editing option will appear as on the example above. Select “Other” from the link dropdown and type %unsub%. This is variable that will give our system the direction to add the email address to the Suppression List when the link is clicked.
Type “Unsubscribe” in the Title if the text is not there already. Set the link color to be visible on your template. Hiding Unsubscribe link will negatively affect your deliverability.
Step 4: When you are happy with your email template, click Save button at the top right.

NOTE: We recommend saving your email often as the system login time is short. Currently, we do not have autosave, so any unsaved work will be lost.
We are working on implementing autosave to fix this issue.
After the template is saved, it will appear in the Channels -> Email -> Saved Templates.

On the right side there are options to Edit, Clone, Delete and View the email template.
NOTE: When editing and cloning existing template, it takes longer to load the template, so please allow time for editor to fully load.
Once the template is ready to send, please follow these instructions on how to send an Email Broadcast: https://tryumbrella.com/how-to-send-an-email-broadcast/
NOTE: Email Template Best Practices
1. Ensure the contrast between the text and background is high enough and text is easy to read
2. Add a CTA Button to the Hero image and ensure the message of the promotion is clear at the top of the email, so that the mobile device users can see the most important part of your message without having to scroll down
3. Add Alt text for each image – Inboxes value email senders that put an effort to make their emails optimized for the screen readers and users that have images turned off
4. Test your links and ensure all links work
5. Include a paragraph or two of text, avoid all image emails. Inboxes value good text to image ratio.

Comments are closed